Laban's LeatherCrafting Slideshow

Welcome to my Leather craft Blog

Hello and welcome to my Leather crafting blog. This site is not a how to guide or similar it is simply a place for me to share my leatherwork projects and celebrate my new found hobby. Please feel free to comment on my work and have a nice day.

Cheers

Laban

Sunday 29 July 2012

3" leather guitar strap

My latest leather craft project is a 3" wide Black Leather Guitar strap... Easily my biggest project so far.
The strap is made from 4mm veg tanned leather from Geenhalgh Tannery in Hadden,Vic http://www.gretannery.com.au/. ( a fantastic family business that i was able to visit and hand pick 2 Veg tan sides from while on holidays ).

I used the 3" guitar templates I ordered from Black river Laser http://www.blackriverlaser.com/ in America. ( This company is recommended in http://leatherworker.net/content/ by "chief" and the templates are fantastic.).

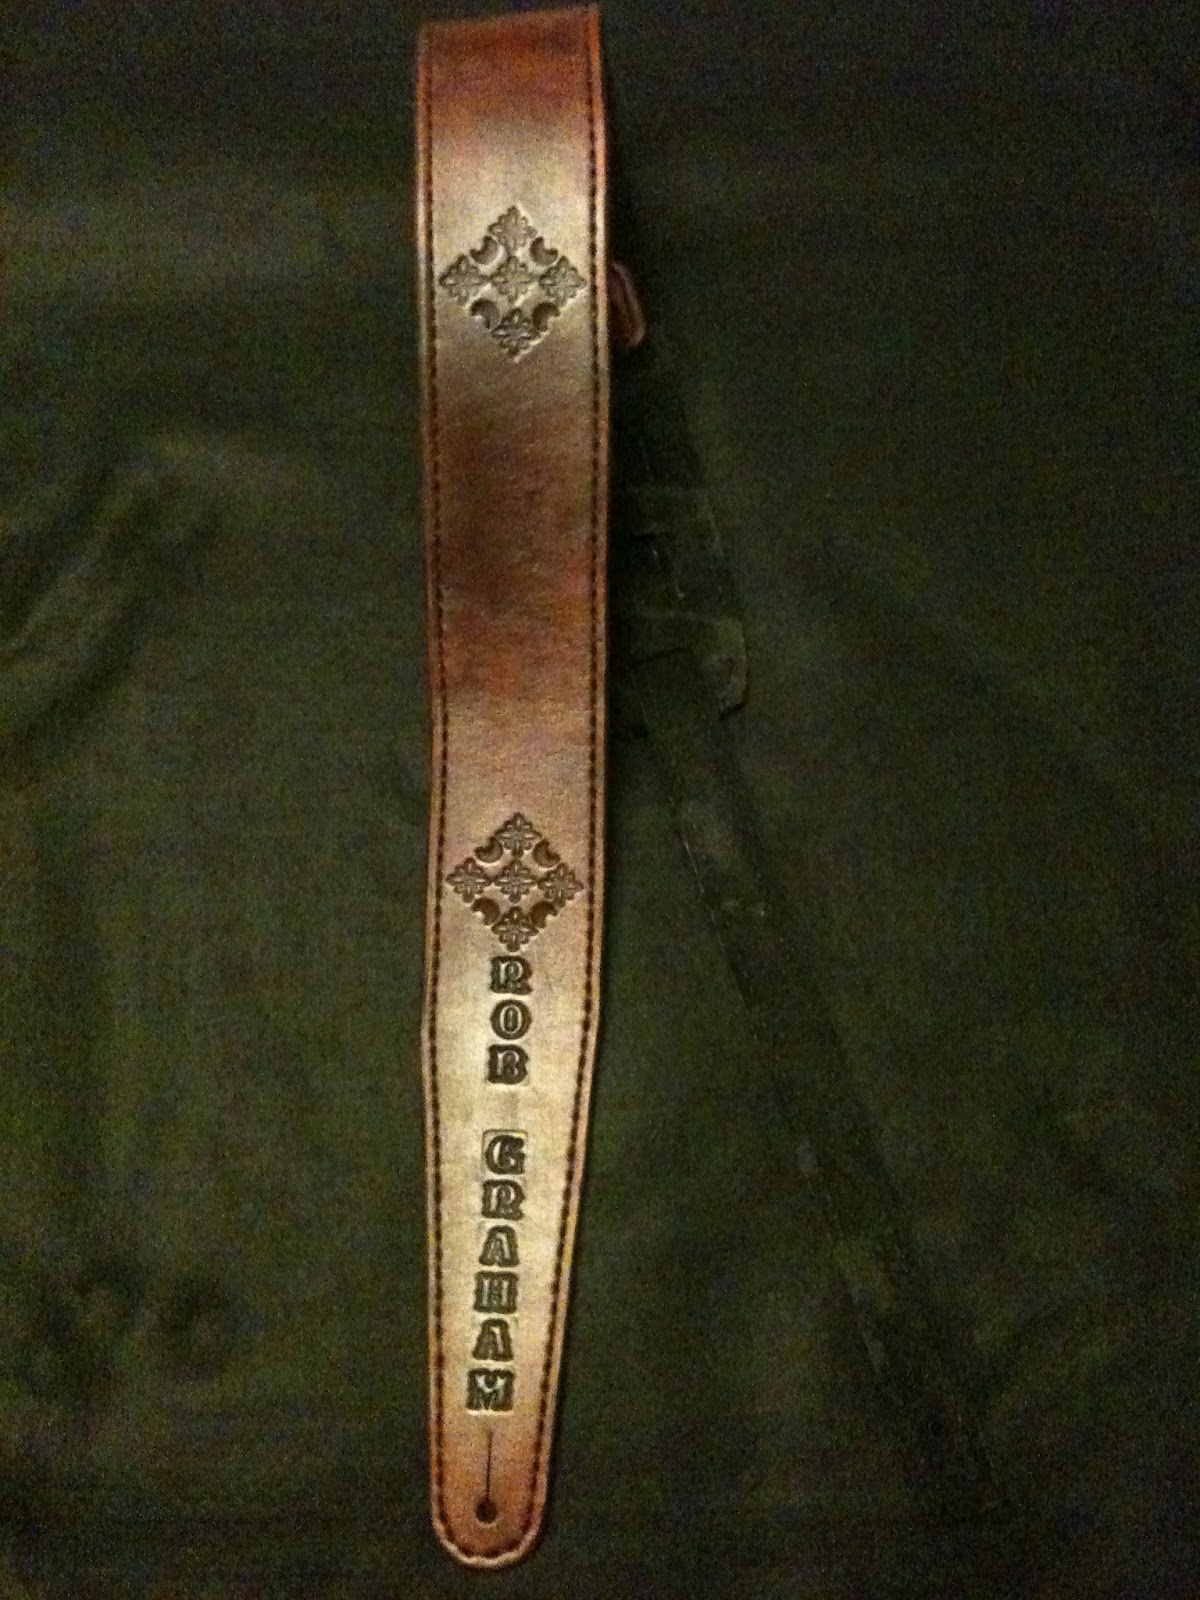
The design I tooled onto the leather was one i found on the internet. The dye is Eco Flow Midnight Black all in one. The Tooling on the extension strap is a Tri basket weave with a sun burst boarder.

Finally the entire strap is completed with a Mexican Round Braid using Black lace from the Greenhalgh tannery. The Mexican Round Braid techniques i use were done exactly as described by Chief in his Youtube lacing tutorials. http://www.youtube.com/watch?v=qWuX2jZ5EzU. For anyone learning how to apply this technique these videos are fantastic...you will not find better..thanks Ken.
The back of the strap is lined with black felt.

All up, including drying, the project took me about 10 hrs and I enjoyed every minute.

A special thanks goes out to Chief (Ken) and Cheryl (Double C) from Leathercrafter.net for help and advise.

Strap on my guitar

3" Guitar strap

Close up of tri basket weave & lacing

mexican round braid

Saturday 14 July 2012

Guitar Strap - My first One

Well its the school holidays, all my preparation for the next term is done and the tax man has paid me back so i've had money to spend and time to spend it.

I went to the Grenhalgh Tannery in Ballarat and bought my first pieces of Veg tanned sides. One side was 4mm thickness for use in the making of Guitar straps / belts. I also spent a small fortune on tools required for cutting, shaping, punching, stitching and dying leather.

Armed with all of these shinny new things I have made my first attempt at making a Guitar Strap from scratch.......see results below.

At work I share an office with a fantastic fellow who's passion is playing the guitar. He and I have discussed guitar straps at length and he gave me an old strap that i used as a template for this project. Therefore this first strap is for him.

I think its turned out really nicely considering its my first attempt. I will be a little more adventurous with my next strap but i was more focused on the process than the outcome this time.

Guitar strap

Guitar strap

Guitar strap

Tri Fold Wallet

Well after such a long time i had finally had a burst of creativity and decided to make a new leather project. Actually I happened to find a Tandy leather craft project that had fallen down behind my desk and i couldn't help but turn it into something :)
My fathers birthday is next month so I decided to make the project for him with a cycling theme. He rides a Carlnago bicycle which he tells me is the ferarri of the cycling world so the first carving i did was a combination of the Carlnago logo and his initials. The second carving was a stylised  bicycle....not to shabby for freehand if i do say so myself.

The dying and stitching have come of nicely....i think i've got the hang of this. My son calls it sewing...i call it stitching or lacing...far more manly IMO :)

Tri Fold Wallet

Carlnago Logo and Initials

Bicycle

Saturday 24 March 2012

Clipper Wallet

Woo Hoo I've found time this weekend to complete another project...I'm on a roll :)
This weeks project was a Clipper Wallet from Tandy Leathercraft.
I made a lot of changes to the suggested tooling and dying instructions on the packet.

Firstly i went looking on the internet and found some Celtic designs. Believe it or not but Tattoo catalogues are an outstanding source of designs for leathetcraft tooling. Both of the designs i used on this project were tattoos. I simply printed the pictures and traced the image directly onto the damp leather. After that i simply bevelled the outside of the designs and used a small pear shader to bevel the inside areas. 

As for the dye work i used Emerald Green to highlight the designs with Black dye backgrounds. Once dry i resisted the designs. The next day i stained the pieces and added a final resist to make the wallet more durable.

I wasn't sure how the stitching would turn out because the project came with White thread. However once finished i actually like the thread as i feel it is a nice contrast to the overall dark colouring of the project.

A few weeks ago I expressed in a post that working with colour was something that i needed to work on and better understand. I feel now that i'm getting a handle on this element of leather crafting. I now know that colour needs to be applied in stages and "built up" to the required level. between colour coats you should "rub" off excess dye and be prepared to apply more than one coat. Allowing resist "sheens" to dry properly is also key. If you don't then the dye will "stain" the colour.

I have also decided to start building up a hand cutting / stitching set of tools and to buy some "Veg tan" leather. I have enjoyed making the pre cut projects from Tandy Leathercraft but now want to try my hand at making projects from scratch. So ebay here i come.

Clipper Wallet - Celtic Pattern

Clipper Wallet - Celtic Dragon

Clipper Wallet

Tuesday 20 March 2012

Leather Journal Cover

Busy busy busy.....I wish I had more time for my leather working. I plan to do a project but something always comes up or needs to be done. I finally found time this week to sit down and enjoy a new project. Pene created a journal of inspirational thoughts, sayings and images using her awesome "stamping up" skills, so i offered to make her a leather cover for it.

The border patterns were created with a craft aid and swivel knife. The raised leather disc in the centre with a flower was actually my first attempt at coloured leatherwork (see my post in February of the coloured coaster) that i glued to the cover as a feature.

As you can see i have greatly improved my colouring skills since my last attempt on the Dragon Belt. 

I think that i have learnt that the colouring / dying process is an exercise in patients. The less you rush the better the outcome.

I think Pene was very pleased with her journal cover.....very satisfying outcome for all :)

Leather Journal Cover

Sunday 26 February 2012

Ipad Cover

Well my latest and if i do say so myself greatest project is finally complete. This project took 2 weekends, including careful planning, tooling, knife work and a dye process with 4 stages. I used all of the techniques i have learnt to date and the final result looks pretty good if i do say so myself.

The original project designs look like this

Tandy Leather Craft Ipad Kit
My final design 
Front - Dragon Scales with Dragon

Back - Dragon Scales with Initials in Scroll

Ipad Cover

This iPad cover features a Dragon Scale effect and 2 central framed sections with a Dragon and my Initials in a winding scroll.

The colouring includes Saddle tan for the images, Black Dye for the borders and Briar Brown for the Scales and border.

Stitching is Double Loop

I really enjoyed making this :)

Woods Tool - Leather Sheath

This weeks leather crafting project was a leather sheath for a small flashlight and small knife.
Overall it was a very easy project to make with the only real challenge being the stitching at the end through 4 layers of leather. Luckily i recently bought a stitching pony and this made it much easier to do.
I gave this project to my father in law and i think he was pretty happy about it. Especially as it was embossed with his initials to personalise it.

Woods Tool - Leather Sheath